How to Assemble Tricycle?
Learn how to assemble a tricycle step by step with our easy guide. From fitting the front wheel and handlebar to installing safety features like the headrest bracket and canopy, follow our instructions for a safe and secure assembly. Don’t miss the tips for adjusting the push handle and adding the basket and footrests for added convenience. Get your tricycle ready for a smooth ride today!
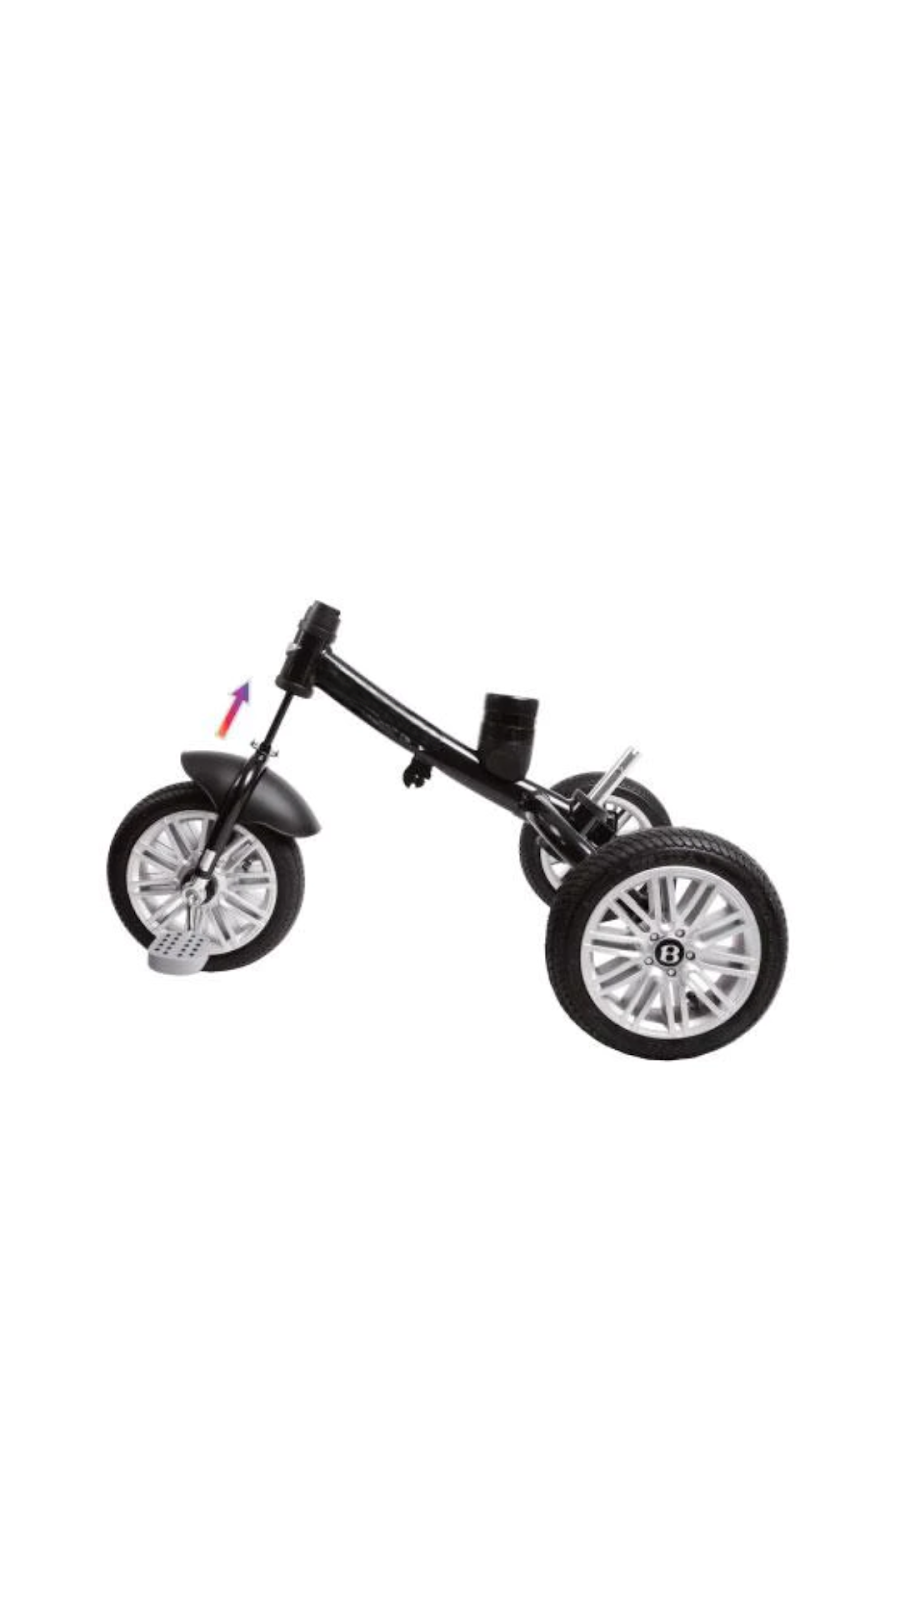
Step 1: Place the front wheel (C) onto the frame (A) in step one.
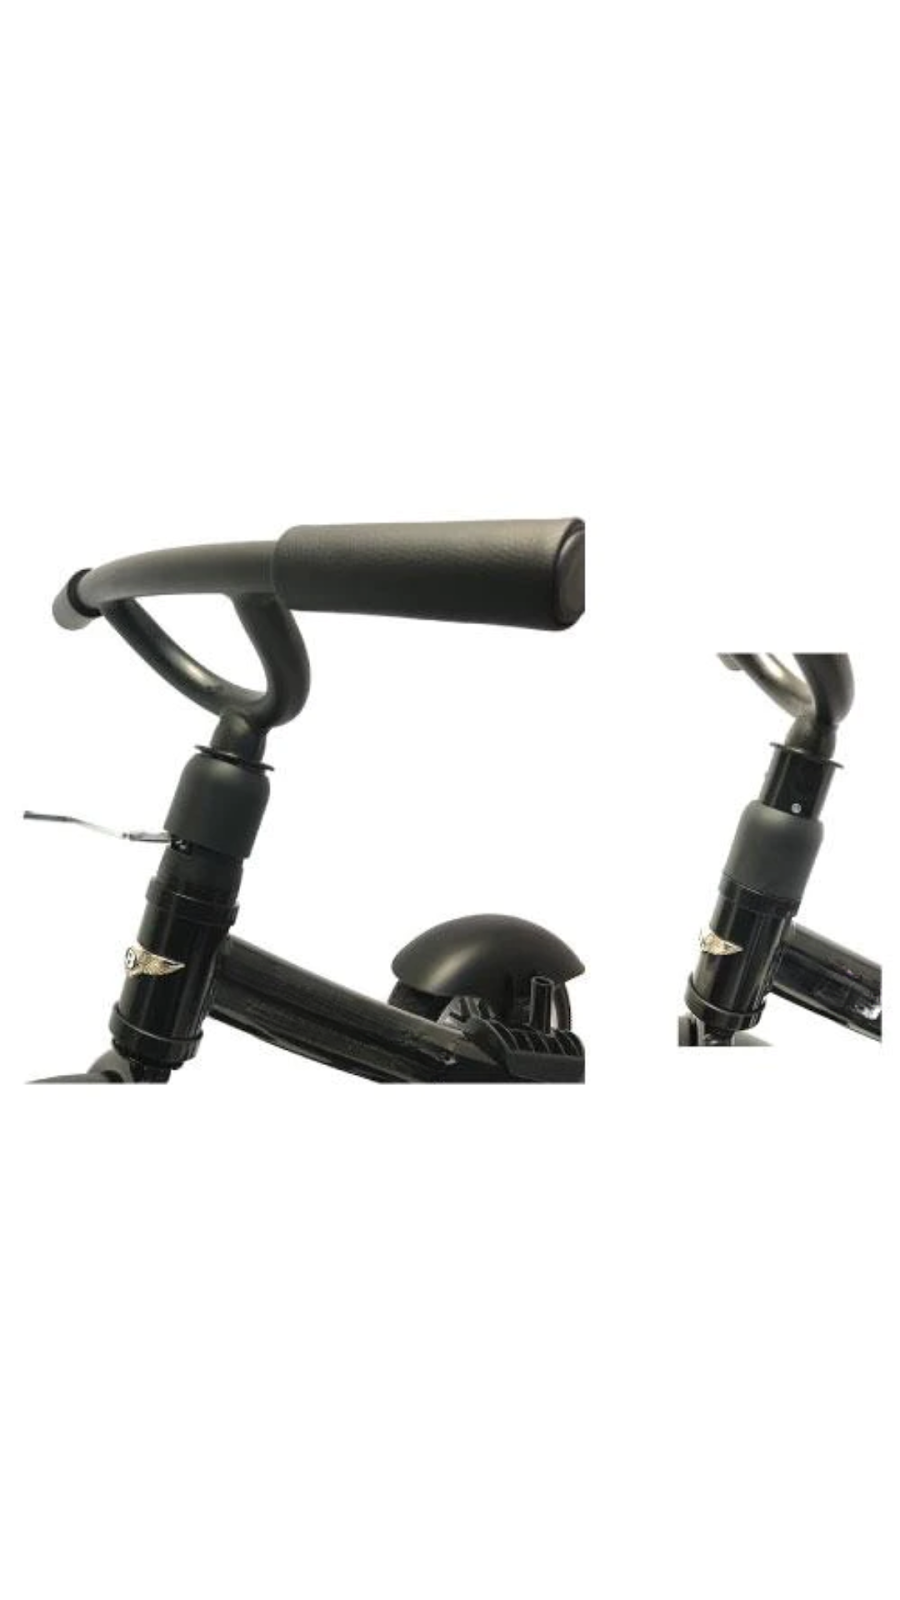
STEP 2: Using the allen key that is supplied, insert the handle bar (B) into the frame (A) and tighten.
Step 2 (A): Align the handlebar and use the little allen key to tighten the built-in screw; be cautious not to strip the thread. When you’re done, pull down and snap the lid into place.

Step 3
Fit the headrest bracket (g1) into the seat (G) and the seat (g) onto the frame (a). To guarantee a snug fit, tighten the plastic bolt.
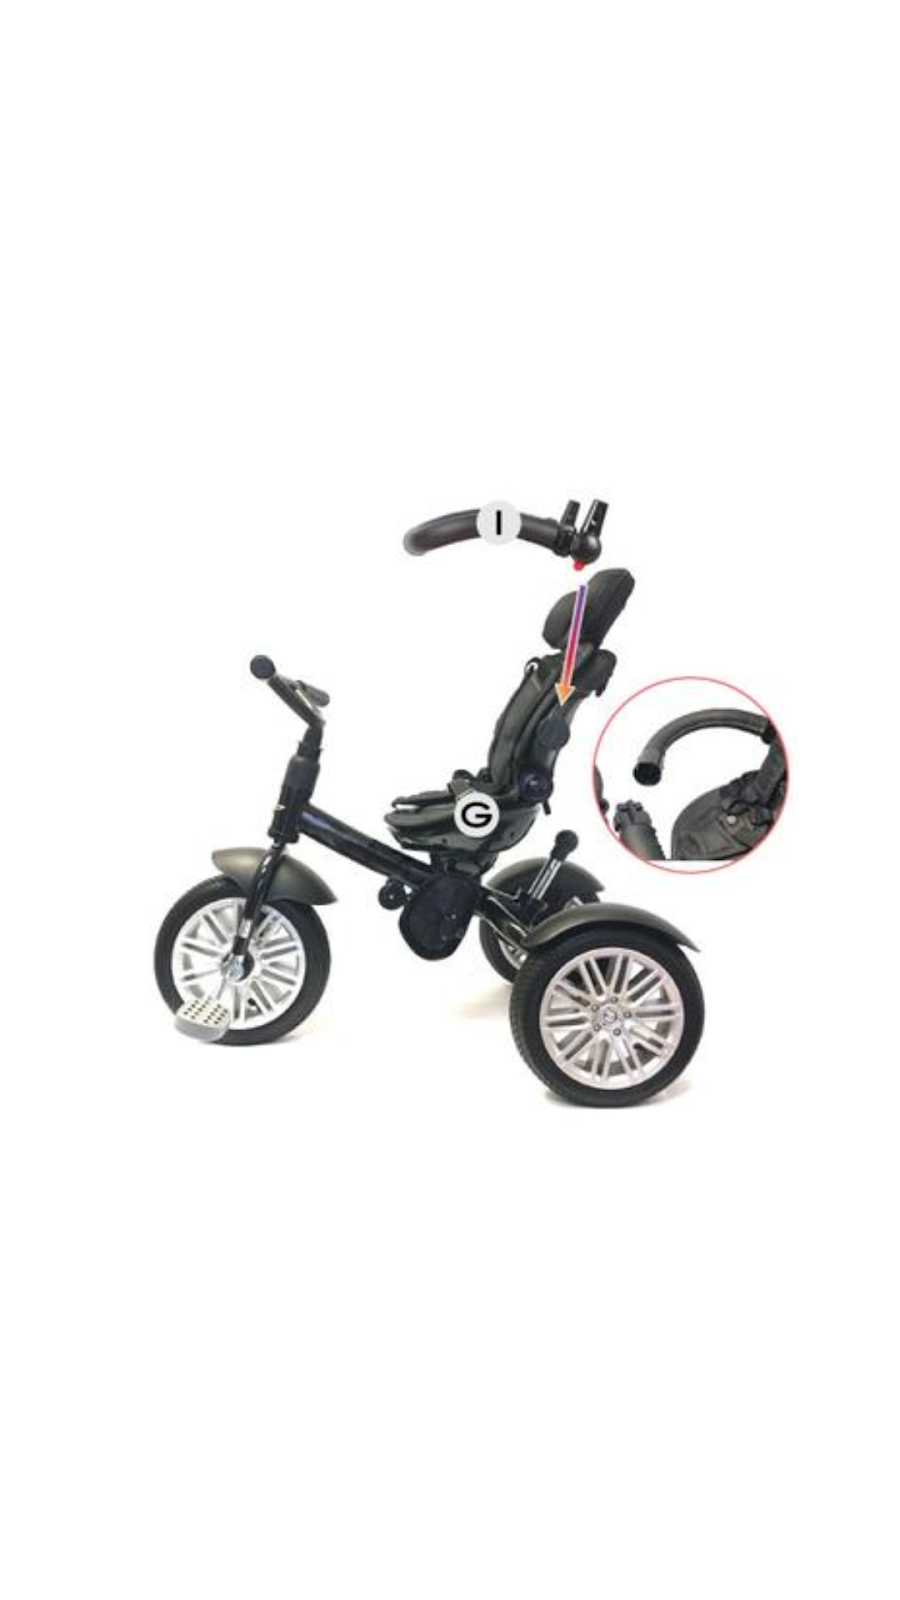
Step 4
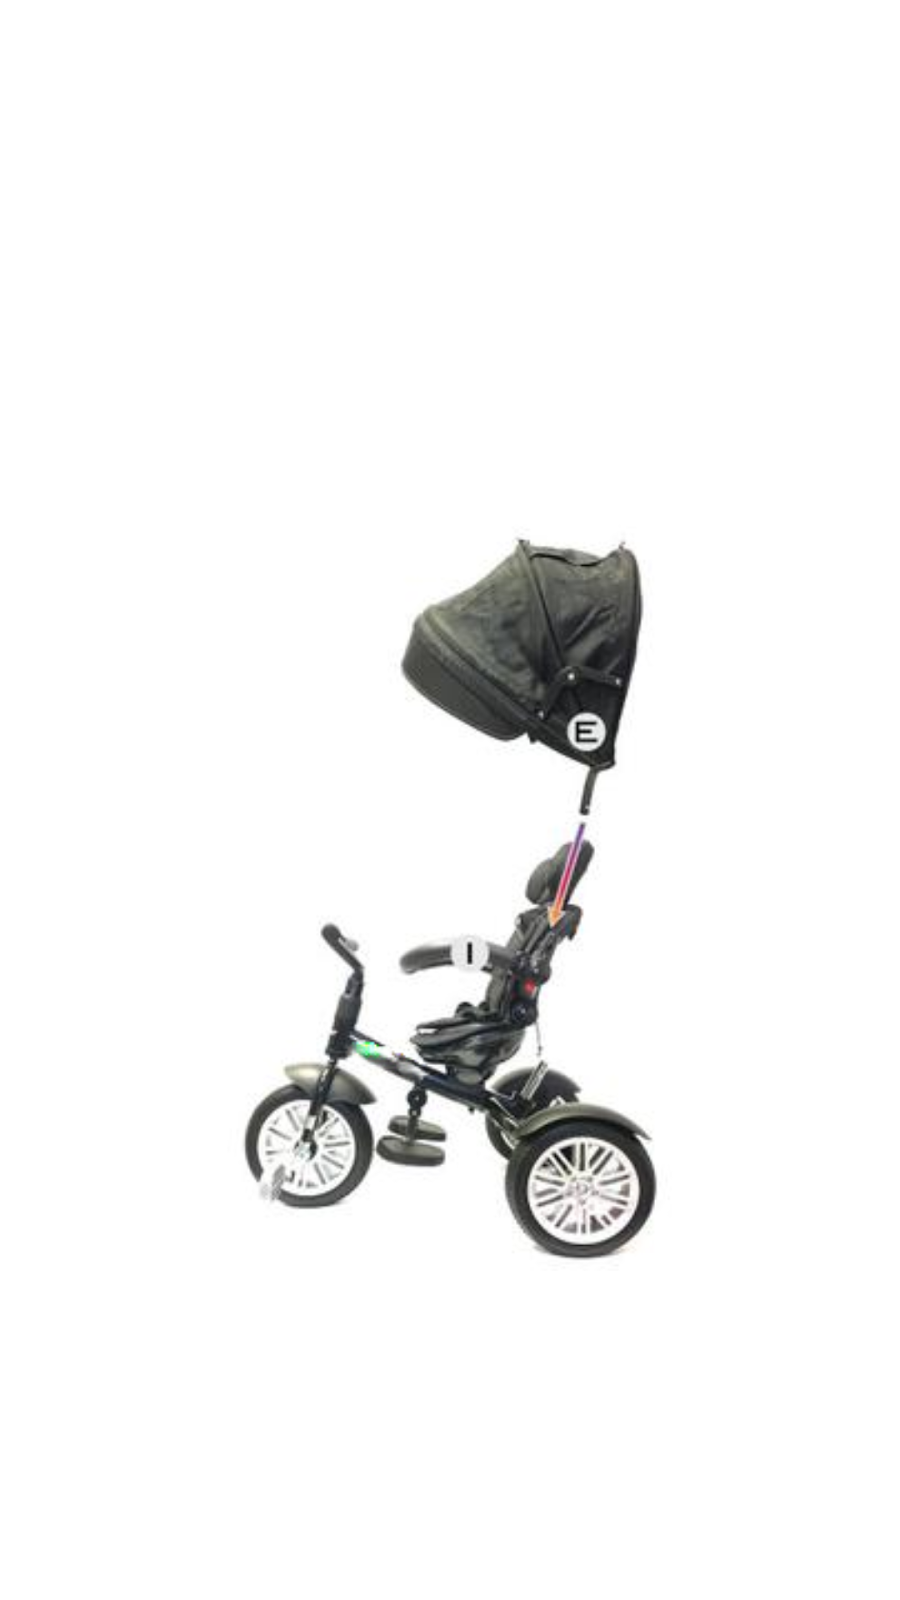
Place the safety guard (I) into the seat (G).
The front safety guard slides in. Release and open by applying pressure on both sides.
Step 5: Fit the canopy (e) into the safety guard’s sides (i).
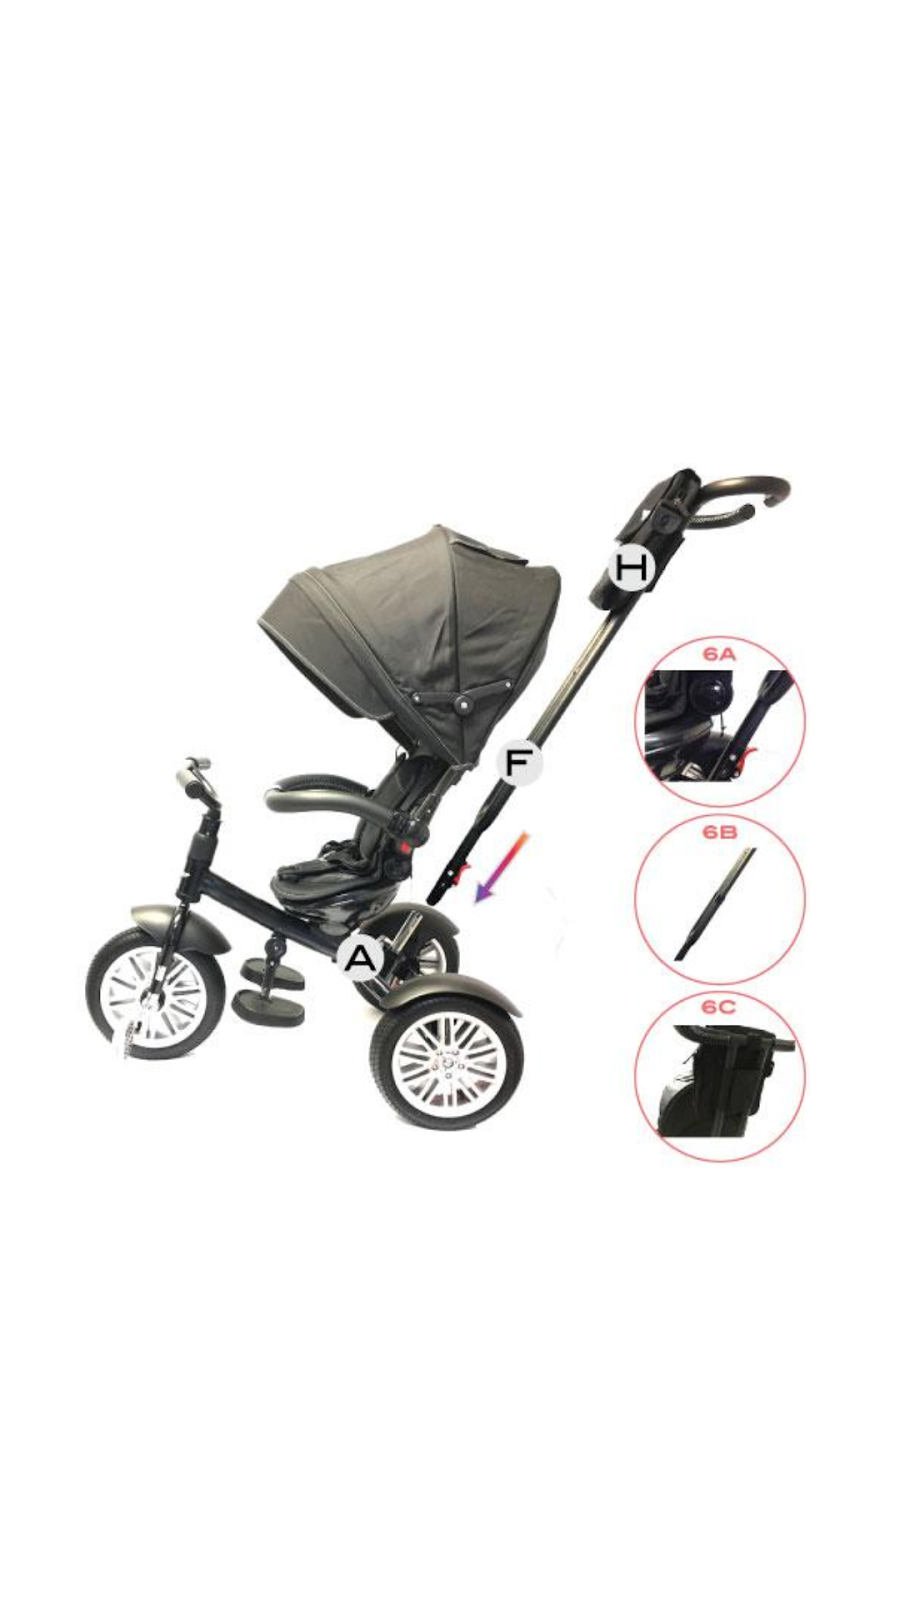
Step 6: Install the bag (h) onto the push bar (f), lock the lever by drawing it up, and insert the push bar (f) into the rear of the frame (a).
6A: With the red lever down, insert the push handle (f) into the frame (a). To lock in the push handle bar, raise the lever.
6B: Slide the push handle’s upper section into its lower section. This is height-adjustable and has two locking positions.
Step 7: Place the basket (j) underneath the frame (a). With the integrated magnetic clip, it will self-tighten.
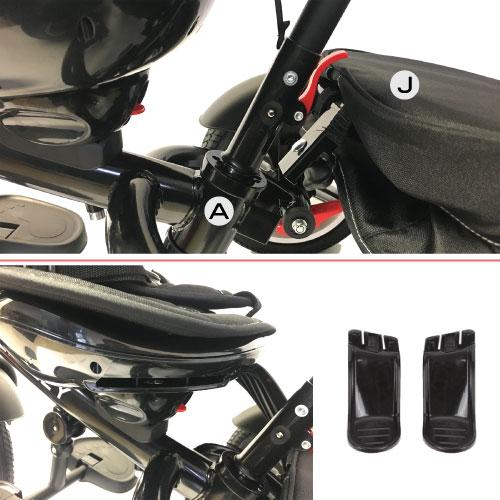
Then, as seen above, slide the baby footrests into the openings beneath the seat cushion if necessary.
lampion
February 21, 2025KAtjU7ihOrE
arionplay
January 22, 2026This assembly guide breaks down each step clearly, especially the handlebar alignment and canopy installation. Following systematic procedures reminds me of platform development – every component must fit precisely for optimal performance. Similarly, the arionplay app ensures smooth user experiences through meticulous design. Great safety focus throughout!
jilitt2026
January 27, 2026Interesting read! Seeing platforms like jilitt 2026 app prioritize security & responsible gaming is crucial. A smooth user experience, like they describe, is a big plus too – essential for trust! 🤔